Udemy 강좌 'Complete C# Unity Game Developer 3D' 리뷰 및 기술 기록지입니다.
Argon Assault : 96. ToString() To Display Score ~ 107. Wrap Up - Argon Assault
96. ToString() To Display Score
- UI > TextMeshPro > Text(ScoreBoard)에서 Enemy가 제거 되었을 때 점수를 캔버스에 Display.
C# Scrpt : ScoreBoard
using System.Collections;
using System.Collections.Generic;
using TMPro;
using UnityEngine;
public class ScoreBoard : MonoBehaviour
{
int score;
TMP_Text scoreText;
void Start()
{
scoreText = GetComponent<TMP_Text>();
scoreText.text = "Start";
}
public void IncreaseScore(int amountToIncrease)
{
score += amountToIncrease;
scoreText.text = score.ToString();
}
}
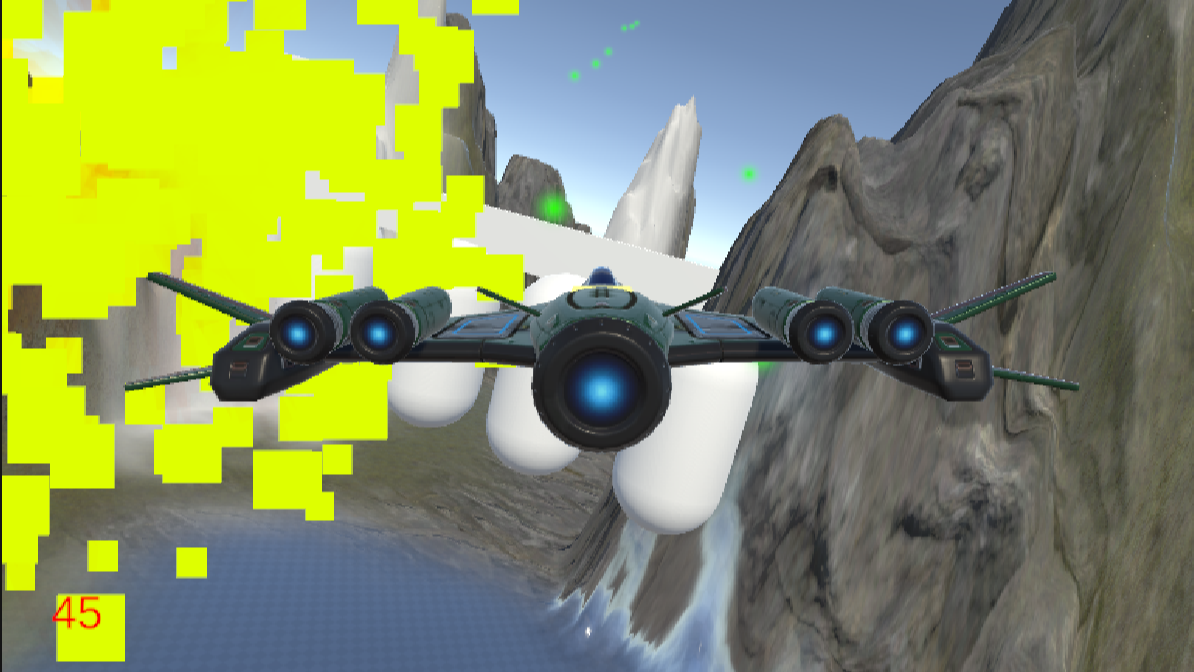
시작시 'Start' (왼쪽) / 게임 플레이 중 점수 표시 (오른쪽)
97. Enemy HitPoints
- hit points 설정 후, Enemy 제거
C# Scrpt : Enemy
using System;
using System.Collections;
using System.Collections.Generic;
using UnityEngine;
public class Enemy : MonoBehaviour
{
[SerializeField] GameObject deathVFX;
[SerializeField] GameObject hitVFX;
[SerializeField] Transform parent;
[SerializeField] int scorePerHit = 15;
[SerializeField] int hitPoints = 3;
ScoreBoard scoreBoard;
void Start()
{
scoreBoard = FindObjectOfType<ScoreBoard>();
}
// Start is called before the first frame update
void OnParticleCollision(GameObject other)
{
ProcessHit();
if (hitPoints <1)
{
KillEnemy();
}
}
private void KillEnemy()
{
GameObject vfx = Instantiate(deathVFX, transform.position, Quaternion.identity);
vfx.transform.parent = parent;
Destroy(gameObject);
}
private void ProcessHit()
{
GameObject vfx = Instantiate(hitVFX, transform.position, Quaternion.identity);
vfx.transform.parent = parent;
hitPoints--;
scoreBoard.IncreaseScore(scorePerHit);
}
}
98. Set up Enemy Prefabs
- 새 Scene을 만들어 Enemy가 될 asset을 불러옵니다.
- asset 폴더를 새롭게 만들어 구분을 하고, 기존 MainLevel Scene에 적용합니다.
- 각 asset을 보기 쉽게 이름을 변경하고, enemy 스크립트를 적용합니다.
C# Scrpt : Enemy
void Start()
{
scoreBoard = FindObjectOfType<ScoreBoard>();
AddRigidbody();
}
void AddRigidbody()
{
Rigidbody rb = gameObject.AddComponent<Rigidbody>();
rb.useGravity = false;
}
99. Using FindWithTag()
- spawnAtRuntime에서 <spawnAtRuntime> tag 생성
C# Scrpt : Enemy
using System;
using System.Collections;
using System.Collections.Generic;
using UnityEngine;
public class Enemy : MonoBehaviour
{
[SerializeField] GameObject deathVFX;
[SerializeField] GameObject hitVFX;
[SerializeField] int scorePerHit = 15;
[SerializeField] int hitPoints = 30;
ScoreBoard scoreBoard;
GameObject parentGameObject;
void Start()
{
scoreBoard = FindObjectOfType<ScoreBoard>();
parentGameObject = GameObject.FindWithTag("SpawnAtRuntime");
AddRigidbody();
}
void AddRigidbody()
{
Rigidbody rb = gameObject.AddComponent<Rigidbody>();
rb.useGravity = false;
}
// Start is called before the first frame update
void OnParticleCollision(GameObject other)
{
ProcessHit();
if (hitPoints < 1)
{
KillEnemy();
}
}
private void ProcessHit()
{
GameObject vfx = Instantiate(hitVFX, transform.position, Quaternion.identity);
vfx.transform.parent = parentGameObject.transform;
hitPoints--;
scoreBoard.IncreaseScore(scorePerHit);
}
private void KillEnemy()
{
GameObject vfx = Instantiate(deathVFX, transform.position, Quaternion.identity);
vfx.transform.parent = parentGameObject.transform;
Destroy(gameObject);
}
}
좌측 Hirarchy 화면
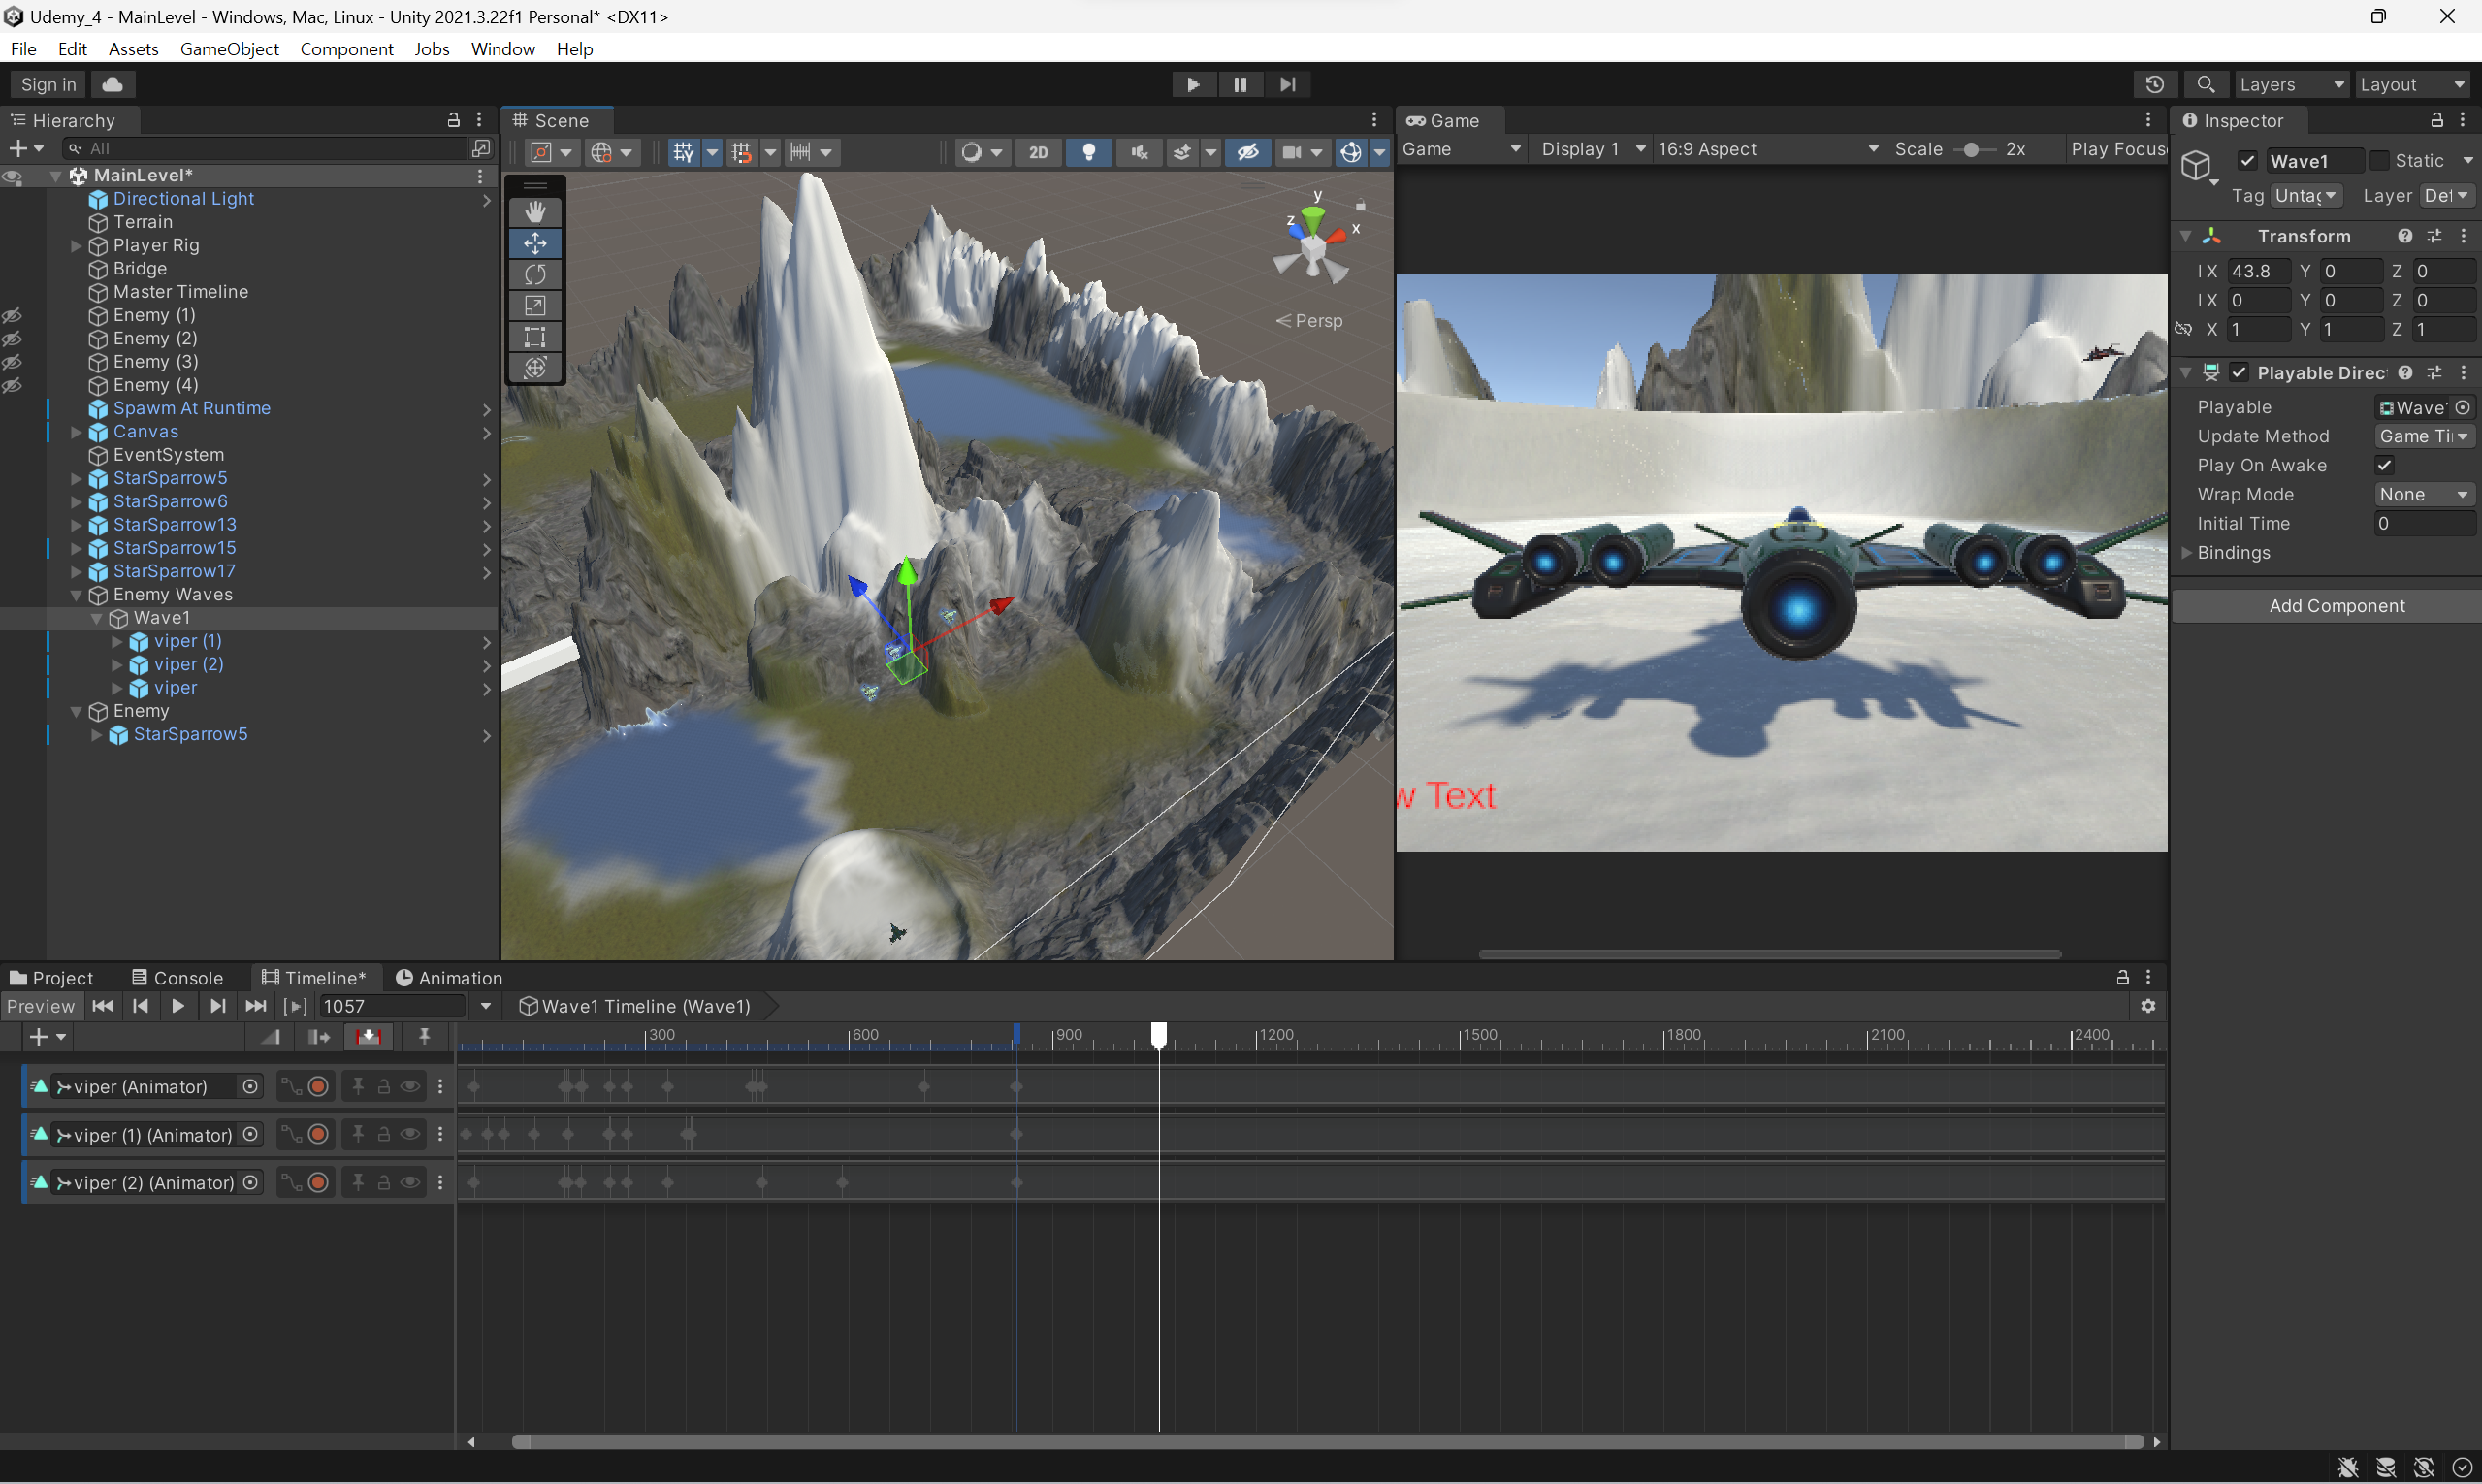
100. Control Tracks For Enemy Waves
- Enemy Waves에 asset을 추가하고 아래 사진과 같이 Timeline을 생성합니다.
- 반복 작업을 통해 Enemy TImeline을 여러 개 만듭니다.
- 생성 후, Master Timeline에 control track을 생성합니다.
101. Timeline For Dialogue
- Hierarchy > UI > Image > 원하는 그림 삽입
- Master Timeline > Control Track 선택 후 원하는 Time에 Image 설정 및 Audio Track을 이용 audio 설정

102. Singleton Pattern For Music Player
- Singleton Pattern : 소프트웨어 디자인 패턴에서 싱글턴 패턴을 따르는 클래스는, 생성자가 여러 차례 호출되더라도 실제로 생성되는 객체는 하나이고 최초 생성 이후에 호출된 생성자는 최초의 생성자가 생성한 객체를 리턴한다.
(출처 : https://ko.wikipedia.org/wiki/%EC%8B%B1%EA%B8%80%ED%84%B4_%ED%8C%A8%ED%84%B4)
C# Scrpt : Music Player
using System.Collections;
using System.Collections.Generic;
using UnityEngine;
public class MusicPlayer : MonoBehaviour
{
void Awake()
{
int numMusicPlayers = FindObjectsOfType<MusicPlayer>().Length;
if (numMusicPlayers > 1)
{
Destroy(gameObject);
}
else
{
DontDestroyOnLoad(gameObject);
}
}
}
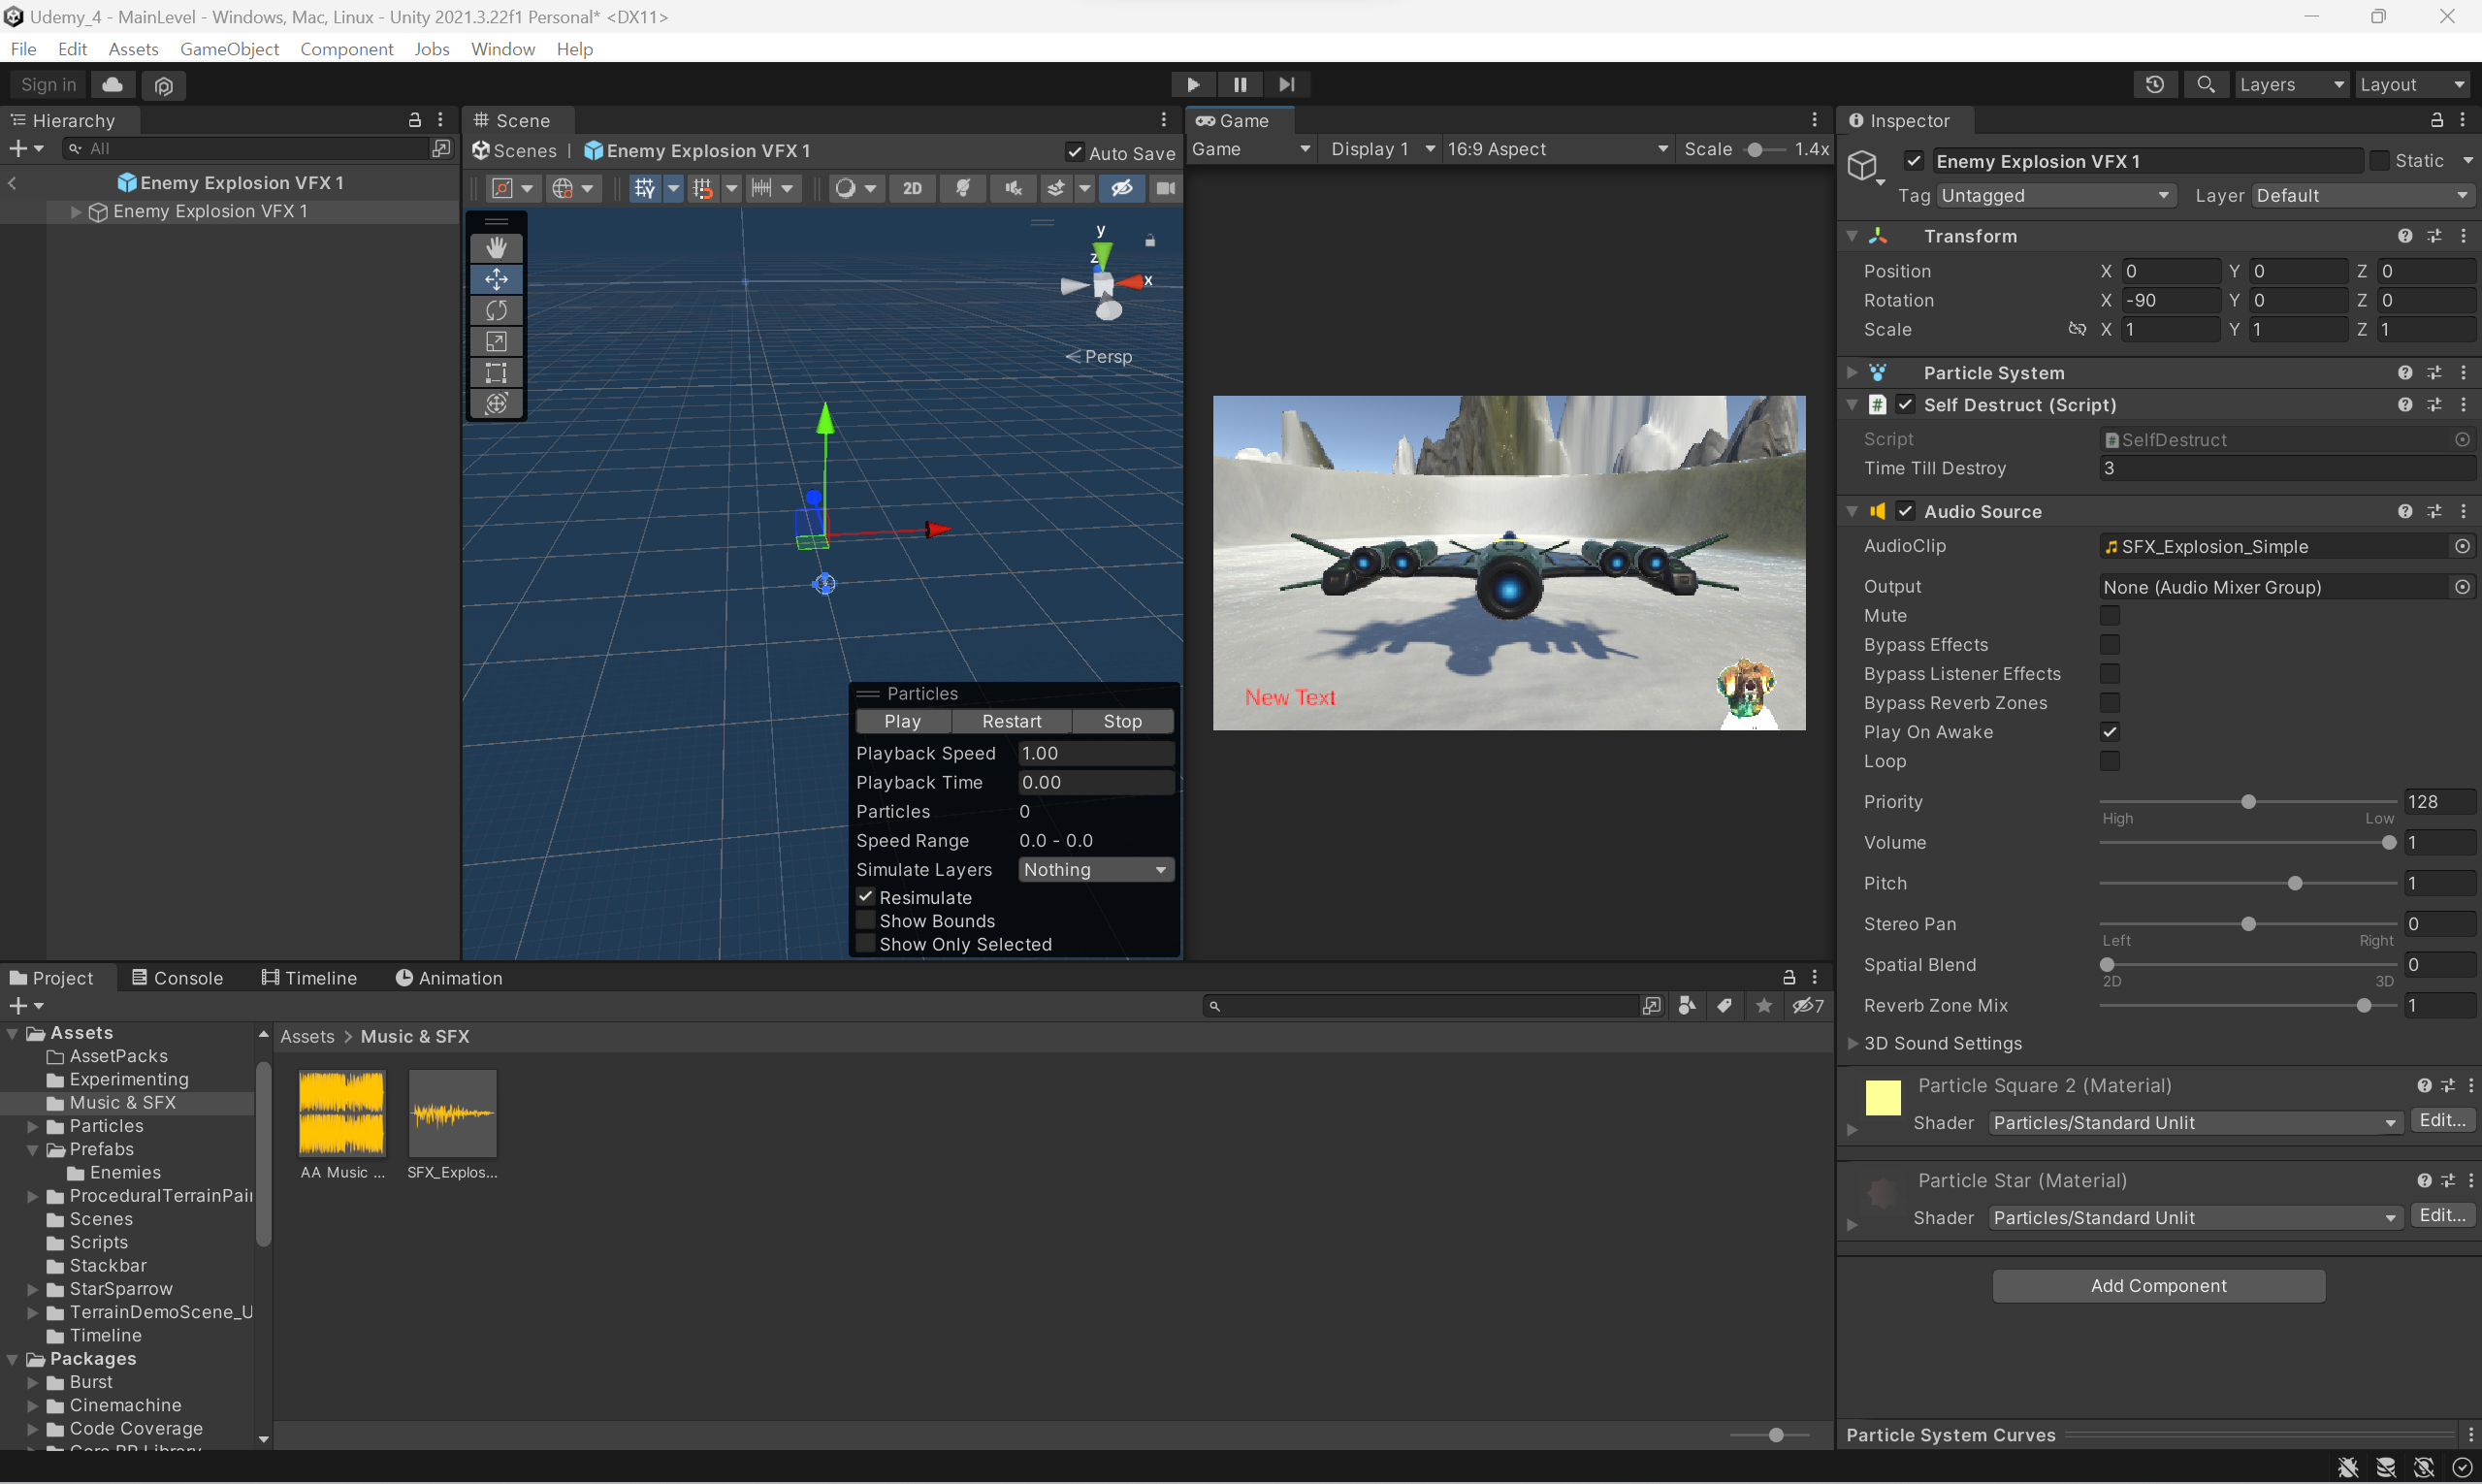
103. Sneaky Explosion SFX
- SFX와 VFX를 묶어 동시에 Enemy를 공격했을 때 효과가 날 수 있도록 VFX에 Audio Source를 추가합니다.
104. Skybox & Lighting
- Material > Skybox를 통해 원하는 Skybox 지정 혹은 asset 다운 받아서 사용
- Directional Light 이용해 빛 설정
105. Add Post Processing
- Package Manager > Post Processing install
- Hierarchy > creat Empty > Post Processing 이름 변경
- asset > post-processing profile 생성
- Hierarchy > Post Processing에 post-process Volume 추가 후, asset 추가 및 Layer 생성
- Main camera에 post- process layer 추가 후, layer 지정
106. Your 3 Minute Experience
- Enemies : apperance, size, speed, hit points, movements pattern, FX, score
- Player rail : speed of movement, where you fry, rotation, movement patterns
- Environment : texture, shapes, trees, obstacles, explosions, colors, lighting, visibility
- Player : laser speed and color, controls, camera